Monday, January 14, 2013
Liebster Award X3 !
Thank you so very much to both Jenna (from Demure in Diamonds) and Marcy (from Budget Friendly Fashionista) for nominating me again for the Liebster Award! Since I have already been nominated once before, I am not going to do the questions and random facts again (I don't know if I could think of any more random facts -- hah!). But check out the right side-bar because I added a Liebster Award image to the awards category!
Thank you again Jenna and Marcy and also a big thanks to all of my supporters. You all are so amazing!
Tuesday, January 8, 2013
L'Oreal Magic Smooth Soufflé Review
Now, I know this isn't a new product, but this is a product that I FINALLY gave in to and I figured it'd be a good one to write a review on for those of you that are curious like I was. This is a little pricey for a drugstore product (around $16), which is one reason I was hesitant to buy it. I have looked at this foundation for months and months and when it was on sale I just had to pick it up.
My first impression wasn't great - it looked a little dry and flaky on my skin. But when I used this (for my second time) with my Sigma F84 brush (instead of my RT Expert Face Brush) it looked flawless! Also, the color selections were hard to judge because when you look at the product in the jar (yes, I opened all of the colors - oops!) the product looks darker than they actually are when you put it on your face. But those were the only cons of this product.
I have very oily skin and this product makes you matte all day long! This is a semi-full coverage foundation but it is so light and mousse-like that you can barely feel it on your skin. It is very blendable and the packaging is to die for :)
I do not recommend this product for dry skin - I feel that it would look cakey and would probably dry your skin out even more. However, I think this product would be perfect for oily skin types. Let me know if you've used this product and your thoughts!
Sunday, January 6, 2013
Update and Beauty Blender Comparison!
I know, I know I haven't posted on here in a HOT minute but it's been a busy few weeks. I know in my last post I said I had some exciting news but unfortunately I'm still working on it. It's something that I've been really wanting to do for a year or two now and it's going to take a little more time and courage for me to finalize. So, fingers crossed that I am able to pull it together :) [and thank you all for the encouraging comments/messages -- it really made me happy!]
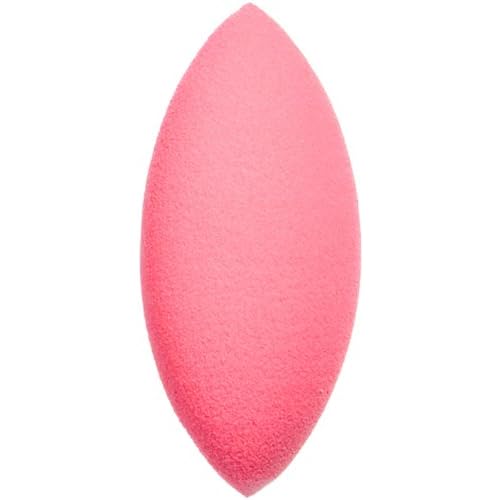
On another note I figured I should give you a beauty post since I haven't in weeks! I decided to do a little comparison between the Beauty Blender and an off-brand beauty sponge that I found at Walgreens.
I already did a post on my beauty blender and how to use it but I wanted to know if it was worth the money or if the $8 sponge from the drugstore works just as well.
Obviously, I like the price of the drugstore sponge better but the finish that the original Beauty Blender gives is something you can't beat. Sure, the drugstore sponge is better than nothing but the Beauty Blender is able to give you a completely flawless complexion and is easier to blend the products into your skin. Now I haven't used these sponge tools for my foundation (I heard they're great for that too, though) but I do use it for my under eye concealer and to set my under eye concealer.
Original Beauty Blender
Beauty Sponge from Soho
I also like the shape of the Beauty Blender better. As you can see above, the Beauty Blender has a pointy side to get into hard to reach/small areas on your face and a flat side which is easy to use for your whole face (or in my case, to set my concealer with my Ben Nye Banana Powder). The drugstore sponge has two pointed edges which can make it difficult to blend larger areas. Furthermore, the drugstore sponge ripped after a few weeks of use; the rip just kept getting bigger and bigger until it finally split in two .... not good :/
Overall, the Beauty Blender is 100% worth the extra money. What are your opinions on the original and drugstore sponges??
Thursday, December 20, 2012
Exciting News + Thank You :)
I have some exciting news coming up in the next few days! It might not be until after Christmas because I'm going to be super busy up until then but I'm going to try my hardest to get it done before Christmas Eve. So keep a look out on my blog/facebook/twitter for this exciting news!
Also I wanted to thank all of you for so much love and support on my blog -- I haven't been doing this long but all of your wonderful comments, messages and kind words mean the world to me!!
Friday, December 14, 2012
How I Contour & Highlight
Contouring & highlighting is probably my favorite part of applying makeup; you can completely change the shape of your face to make it thinner and more defined. Blush and highlights add a touch of color and give a dewy look to your complexion, which is perfect for an evening out. In this post I will tell you the perfect way to contour & highlight along with my favorite products I use.
CONTOUR
Contouring is the perfect way to give your face a better shape while adding a bronzer at the same time. When I contour (which is almost every day) I don't use a bronzer over my face - I don't feel the need.
The first thing you want to do when you contour is find the perfect brush that will fit under your cheekbones. My favorite brush is Sedona Lace's FB05 Dome Contour Brush.
Next find the bronzer you want to use. My favorite is Benefit's Hoola Bronzer. This bronzer looks lighter than a normal bronzer but trust me, it comes out just as dark!
The easiest way to apply cheek contour for beginners is to make a fishy face (by sucking your cheeks in!) This will show you where the hollows of your cheeks are and this is the section where you apply bronzer.
Dip your brush into the bronzer (remember to tap off the excess). Then start your brush where the top of your ear connects with your head and sweep the brush down through the hollow of your cheek (about half of your cheek). Keep sweeping your brush in this area until your desired color is reached. This will form a dark line that won't look very good at first but don't worry, you'll blend it in after you apply blush!
To add a little more contour to your face, sweep some of the product to your forehead temples and on your jawline.
To contour your nose I use the Smashbox Definer Brush 15 and draw a line with the contour on both sides of my nose (the line almost connects your eyebrow down to the end of your nose). I also apply a little bit of product to the tip of my nose in an upside down triangle shape. This will also give you harsh lines on your nose, so make sure to BLEND all the lines downward! (Contouring your nose gives your nose a skinnier effect).
BLUSH
I switch up my blushes daily. I have a whole drawer full and just pick whatever blush I feel like for the day. Also I ALWAYS use at least two different blushes. Using two blush colors gives you a more natural color to your cheeks.
The brush I use is Sedona Lace 850 Large Angled Contour Brush. It fits perfectly on your cheekbones.
When most people apply blush, they put it on the apples of their cheeks. However, this can make your face look rounder and chubbier than it actually is. When I apply blush I put it right above my contour so it goes diagonally back near your hairline (if that makes sense). This effect complements your contour and makes your face more defined.
IMPORTANT STEP: After I apply my blush I take a stippling brush or a flat-top brush and blend the blush and contour together so that there aren't any harsh lines.
HIGHLIGHT
Highlighting is a fast and simple way to give your face a glow without overdoing the amount of sparkle.
My all time favorite highlight for that perfect GLOW is Pop's Lush Blush in Rose Blossom. This is the perfect rose gold color that will complement fair or bronzed skin tones.
I usually just use my fingers to apply my highlight. I put it on my high cheekbones above where I put my blush, down the bridge of my nose and on my cupids bow (this makes your lips look fuller)!
Hope this post helped! It's kind of hard to explain my contouring routine without showing you, so if you have any questions let me know in the comments below!
Saturday, December 8, 2012
Winter Weather Must-Haves
It's getting to be that time of year for snow angels and snow ball fights followed by cozying up near a fire with a mug of hot cocoa. But before the cozying, you need to take off your scarf, gloves, boots and jacket. Here are some of my winter weather must haves for those cold wintery days!
Jacket: North Face
Boots: Target
Hat: H&M
Scarf: H&M
Gloves: Target
Jacket: Lord & Taylor
Boots: Mango
Hat: Loft
Scarf: Michael Kors
Gloves: Michael Kors
Jacket: She Inside
Boots: Chinese Laundry
Hat: H&M
Scarf: Juicy Couture
Gloves: Vera Wang - Kohls
Sunday, December 2, 2012
November Favorites :)
Happy December everyone! Yes, I'm going to say it....I can't believe it's December already!! So I figured I'd make my first monthly favorites blog :) Some of these products are ones I have recently purchased and some are products that I've had but just started loving again. So, without further ado...
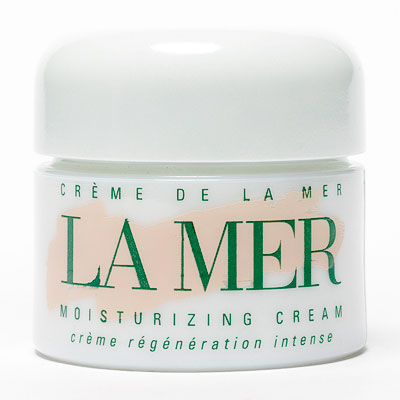
La Mer Moisturizing Cream
I haven't been using this long but I have noticed such a change in my skin's hydration and an overall improvement of my complexion. I cannot say enough good things about this moisturizer! (It also has anti-aging benefits and reduces the appearance of pores as well!)
Rusk W8less Extra Strong Hold Hairspray
Since my hair is so thin, I have problems finding a good hairspray that won't weigh it down. This hairspray by Rusk is my all time favorite - it doesn't weigh hair down and doesn't leave that crunchy feeling all while holding your curls in place for hours!
Benefit's Stay Don't Stray Eye Primer
I'm in love with this eye primer. I hate primers that leave a greasy feel on your eyelids - this primer doesn't do that at all and it holds your eyeshadow in place all day!
L'Oreal True Match Super Blendable Concealer
This concealer is perfect for highlighting and brightening your under eyes and down the bridge of your nose. I have mine in the color Fair/Light Neutral - it is MUCH lighter than my skin tone, but I really like the look of super light undereyes. I also blend this concealer with a damp Beauty Blender for a flawless look.
Neutrogena Shine Control Powder
This powder is perfect for setting your foundation and concealers without making it cakey and keeping you matte for hours. I keep one of these in my purse at all times for a quick touch up!
Elf Blush in Pink Passion
I've mentioned this blush before and for good reason. I've had this blush for a year or two now and I used to use it all the time until it kind of got pushed out of the way by newer blushes. I found this a few weeks ago in the back of my blush drawer and fell in love with it all over again. I wondered why I even stopped using it!
Maybelline The Falsies Volum' Express Mascara
I bought this mascara years ago and I HATED it. I thought this mascara was just horrible and did absolutely nothing, but for some reason I just couldn't throw it away. I decided to try it out again and it is now my number one mascara. I loved the curved brush that helps curl your lashes and the formula isn't too wet or too dry. This is now one of the staple products in my mascara routine!
Tease from the Naked 2 Palette
My all time favorite crease color is Tease from the Naked 2 Palette. I'm not a huge fan of shimmery eyeshadows and this is the perfect taupe-y matte color for your crease. It can be used for an everyday look or you can build it up for a smokey nighttime look.
Paula Dorf Eye Color Glimmer in Silhouette & Eye Color in Mystic
I love these single eye shadows by Paula Dorf. The lighter shade (Silhouette) is perfect for a nighttime brow bone color. It isn't too shimmery but isn't completely matte either. I also like putting this on the inner corner of my eyelid to brighten it up. The darker color (Mystic) is great to make a dark smokey eye. I use this color in my crease and the outer-V on my eye lid for a perfect nighttime look.
Maybelline Color Sensation Lip Liner in Toast
This lip liner is the perfect lipliner for ANY lipstick you have. It's a great nude color but blends so perfectly with your lips that you can even use it with reds, pinks and purples! I like to bring this lip liner when I travel because it's the only lipliner I need to bring!
Maybelline Color Sensational Lipstick in Nude Nuances
I cannot get over how amazing this lipstick is - it is the perfect nude with a pink undertone. And let me just say, I wear this lipstick with anything and everything! However, this was from the Porcelain Collection, which I think was limited edition. It upsets me that I won't be able to find this again but apparently it's a great dupe for Mac's Hue!
Essie's Chinchilly Nailpolish
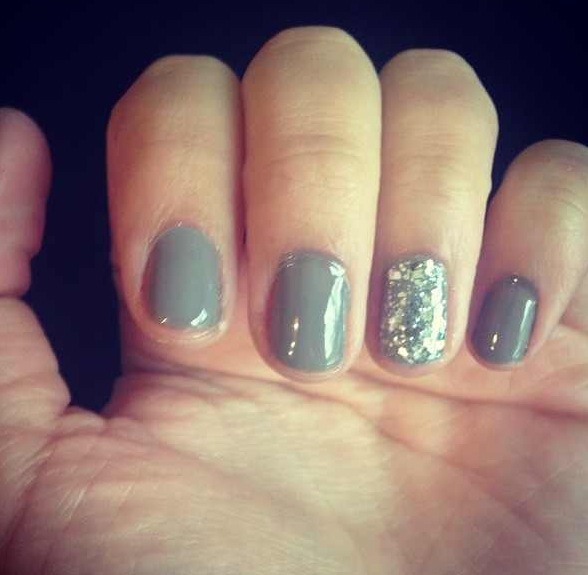
Gray is one of my favorite 'colors'. It goes great with almost everything and looks beautiful on your nails. Chinchilly by Essie is my favorite gray nail polish that I've found yet! Here is a picture of Chinchilly on my nails (with Essie's Set in Stones from the Luxe Effects Collection on my ring finger).
Bath & Body Works' Stress Relief Body Wash & Foam Bath in Eucalyptus Spearmint
If you want to feel squeaky clean and stress free try this body wash! I haven't yet used it as a foam bath but I'm sure I will when it gets cold this winter. The Eucalyptus Spearmint scent helps relax you and keeps you smelling fresh and clean all day! I have the lotion too that I like to use right after I use this body wash in the shower.
Bath & Body Works' Anti-Bacterial Gentle Foaming Hand Soap in Candy Cane Bliss
This is the perfect smelling hand soap for Christmas time. It keeps your hands smelling like candy canes for a while after you wash your hands. Plus it's antibacterial and foaming, which I absolutely love!
Let me know any of your November favorites in the comments below and if there's anything I should try!!
Subscribe to:
Posts (Atom)